Easy Peasy Quesadeasy

Leave a comment

Oy.  Need adult interaction. Send help.  LOL.  I kid.  Ish 🙂  Anyway, had to share this ridiculously delicious and amazing hack/recipe for delish quesadillas.

IMG_5760

You need:

Flour tortillas

Fresh salsa (that is very little liquid and is mostly diced tomatoes, onions, cilantro, parsley like a pico)

Shredded “mexican-complementary” cheese (i.e. cheddar, pepper jack, etc.)

oil

Cubed roasted chicken (I admittedly used Perdue Natural Short Cuts.  SO easy)

IMG_5758

OK.  So.  Dap or brush oil onto bottom of tortilla while skillet is heating.  Then, place tortilla oil-down on skillet.  Add FIRST a bit of cheese (to act as melty glue) then the chicken and using a slotted spoon (to drain salsa/pico) some salsa/pico.  Make sure you drain because too much liquid= nasty soggy quesadilla.  Then add more cheese and fold over tortilla.  Push down and hold.  This makes it all melt together ommmmm nommmmm.  Flip when bottom side is browned.  EN. JOY.

IMG_5752

And because I didn’t take enough pics for the post, check out this amazingly beautiful and unique flower arrangement I received.  LOVE.

Barnyard Bash- Gabriel’s First Birthday

Leave a comment

Guys.  You know I love a good themed party. I mean, I’ve done Elmo, Thomas and the like.  Search the archives for the jam.  Anyway, it was like a month before G’s birthday (I know, second child syndrome) and I finally decided I should get moving on Gabe’s first birthday party. Um hellooooo Amazon! First thing’s first though?! A THEME!

IMG_5313

Super cute photobombed alert!

G LOOOOVES animals and animal noises (he especially loves the APP Peekaboo Barn- download it- your kid will love it and so will you if you’re interested in creepy exorcist style voices lol) so I decided to go with a Barnyard/Animal/Farm theme!  FUUUUUUN!  And so easy. Take a look!

Unfortunately I was unable to photograph all of the goodies, but here are the things I got if you want to get on the barnyard “wagon” as well 🙂

Gabe’s Shirt

Pin the Tail on the Cow game

Favors:

Barnyard boxes filled with Cow Tail Candies, a toy tractor and 2 barnyard animals

Barnyard plates, napkin and cup set

Matching highchair kit (need for smash cake!!)

Adorable hanging cut outs and Personalized Sign

The cake was from Giant and I was beyond please with both the quality and design. IT was also EXTREMELY reasonable ($30 for a half sheet that fed 40) AND the smash cake was included!

So, that was Gabriel’s first birthday party, barnyard style 🙂

IMG_5316

Gabriel “Dita,” with his big brother, Mommy and Daddy

Minion Cake Pops

Leave a comment

So, my big guy and I LOVE to watch Nerdy Nummies on YouTube.  Seriously.  Check it out.  I’m pretty sure she and I are related 🙂  Anyway, as a VERY special treat I have attempted to conquer a couple of Rosanna’s creations and yesterday it was…minion cake pops!  To see the FULL directions and video, click HERE.  Beware- these videos are addicting!  So, my little and I set out to make these babies.  First, mama made a cake; it was one of the coach’s birthdays at Girls on the Run so I made a rectangular cake, and made ONE cut to make a square cake which I iced for the birthday and left the rest for the cake pops.  I put the left over cake in a bowl and mushed it until it was in fine pieces.

IMG_5577

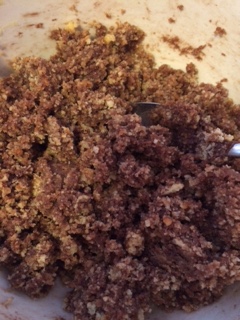
Then I added a dollop of chocolate frosting (you can use any flavor), I know, my measurements are SUPER precise 🙂

IMG_5578

I mushed it up until it became a pasty play dough texture.  THEN I formed the minions.  I did half round balls (BOB) and half banana shaped ones.  Sorry.  Lacking pictures 🙂  I then put the balls/bananas (lol) in the fridge to harden.  While the little was napping, I inserted the cake pop sticks about halfway, adding a bit of frosting as “glue” and let them set int he fridge.  When the little guy woke up, we got to work decorating!  First, the minions got dipped in yellow totally (buy yellow chocolate melts and melt in microwave, stovetop or fondue pot)…

IMG_5582

Then, we dipped in blue (blue chocolate melts) to give them pants!  We then sort of improvised with smarties as eyes (chocolate frosting for the retinas) and I piped blue frosting to define the pants lines.  I used chocolate frosting piped for the goggle lines.

IMG_5583

So listen, they were more delicious than anything. Not as cute as Rosanna’s but a good start!  And, a had a bunch of little fans of these (and isn’t that what really matters?!)!

IMG_5538


When Noodle Coloring>Kitchen Sink Pasta Salad

Leave a comment

I know. Horrible title.  But that is what this post is about 😉  Zach’s school does the best projects.  I love it there.  So does he 🙂  Anyway, a cool thing they do are those noodle-bracelet-things…you know what I mean?  Well I wanted to make a supply to have at home for anytime use and also I thought it would be a fun little project for Zach and I.  While G is napping we try to do a little activity together alone. SO fun.  Anyway, this is how you make the pasta “beads”

  1.  Get WHITE pasta- LESSON LEARNED-I used yellow-y looking ones and it affected the colors (The “blue” looked like blue, ya know, yellow and blue make green).  We got 4 different types:  Ziti, elbow, Wagon wheels and cavatelli (I think?)
  2. Put some of each of the pastas in a ziplock. (Kids can do)
  3. Pour in a few drops of food coloring.(Kids can do)
  4. Optional but recommended:  pour in a tad of rubbing alcohol to make it dry faster- adult do!
  5. SHAKE! SHAKE! SHAKE!  (Until fully coated) The kids LOVE this part!
  6. Pour out onto a baking sheet lined with a couple layers of paper towels. – adult do!
  7. Let dry if needed.

IMG_5433

Sorry.  I didn’t take too many pictures.  BUT, I did decide that while I was “knee deep” in pasta, I would throw together a pasta salad with “everything but the kitchen sink.” LOL I literally scoured the cabinets and fridge for anything that I could dump in that would be complimentary, of course…

My sous chef was quite the help, and while I wish I had some sort of magical recipe, I will admit, I just kind of dumped every thing in and tasted it until it was good 🙂  I mean, isn’t that the key direction to ANY recipe!?

IMG_5437

Anyway, it turned out GOOOOOD and way to kill two birds with one stone: fun activity and delicious colorful meal!  Score!

IMG_5442

Pancetta Pea Pasta

Leave a comment

Yes, three of my favorite ps!  Just.  Like. Olive. Garden.  This 4 ingredient EAST PEASY dinner is a must for anyone craving a hearty warm creamy meal.  Because who isn’t?

Here.  We. Go.

IMG_5396

4 Ingredients:

PASTA ( I like refrigerated fresh pasta as opposed to box for this)

PEAS (I use frozen sweet peas with NO SAUCE)

ALFREDO SAUCE (currently digging Prego- you can make your own but…you could also make your own bread…which I don’t 🙂 so Google that crap if you want)

PANCETTA (I have used diced ham as well which is equally if not more delicious depending on your palette).

First, boil your water. I always add a pour of olive oil and a large dash of salt.  Because “they say so.”  I know. Good reason.   While your water is boiling, heat a bit of oil in a small frying pan and fry your pancetta for a total of five minutes, because, yes, you need to cook pancetta.  Some dude said you didn’t 🙂 WRONG.

IMG_5390

I seasoned my pancetta with some black pepper. It is interesting- I am not a pepper person unless it is accompanied by Alfredo. Then again, but isn’t good when accompanied by Alfredo?

IMG_5393

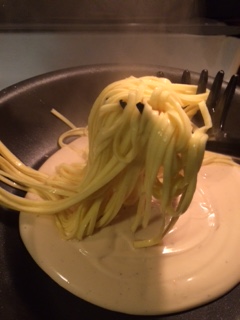
Then get a larger frying pan and heat on a very low setting. Add the Alfredo on the bottom then. Scoop your pasta into the frying pan. I always use some of the retained pasta water because you are supposed to “marry the pasta to the sauce “according to Rachel Ray.

IMG_5394

Add peas and stir to combine completely.

IMG_5395

Plate and top with the pancetta.  OM. FREAKING. NOM.

ENJOY!

Ode to 2015

Leave a comment

On the first day of this new year, I wanted to take a moment to reflect on the year prior. 2015 was a year of an immense amount of change for our family of all different types. It was challenging, rewarding, happy and sad.  A year of dualities, perhaps.  In the end I am thankful for health, happiness and most of all, these two amazing creatures.

IMG_3800